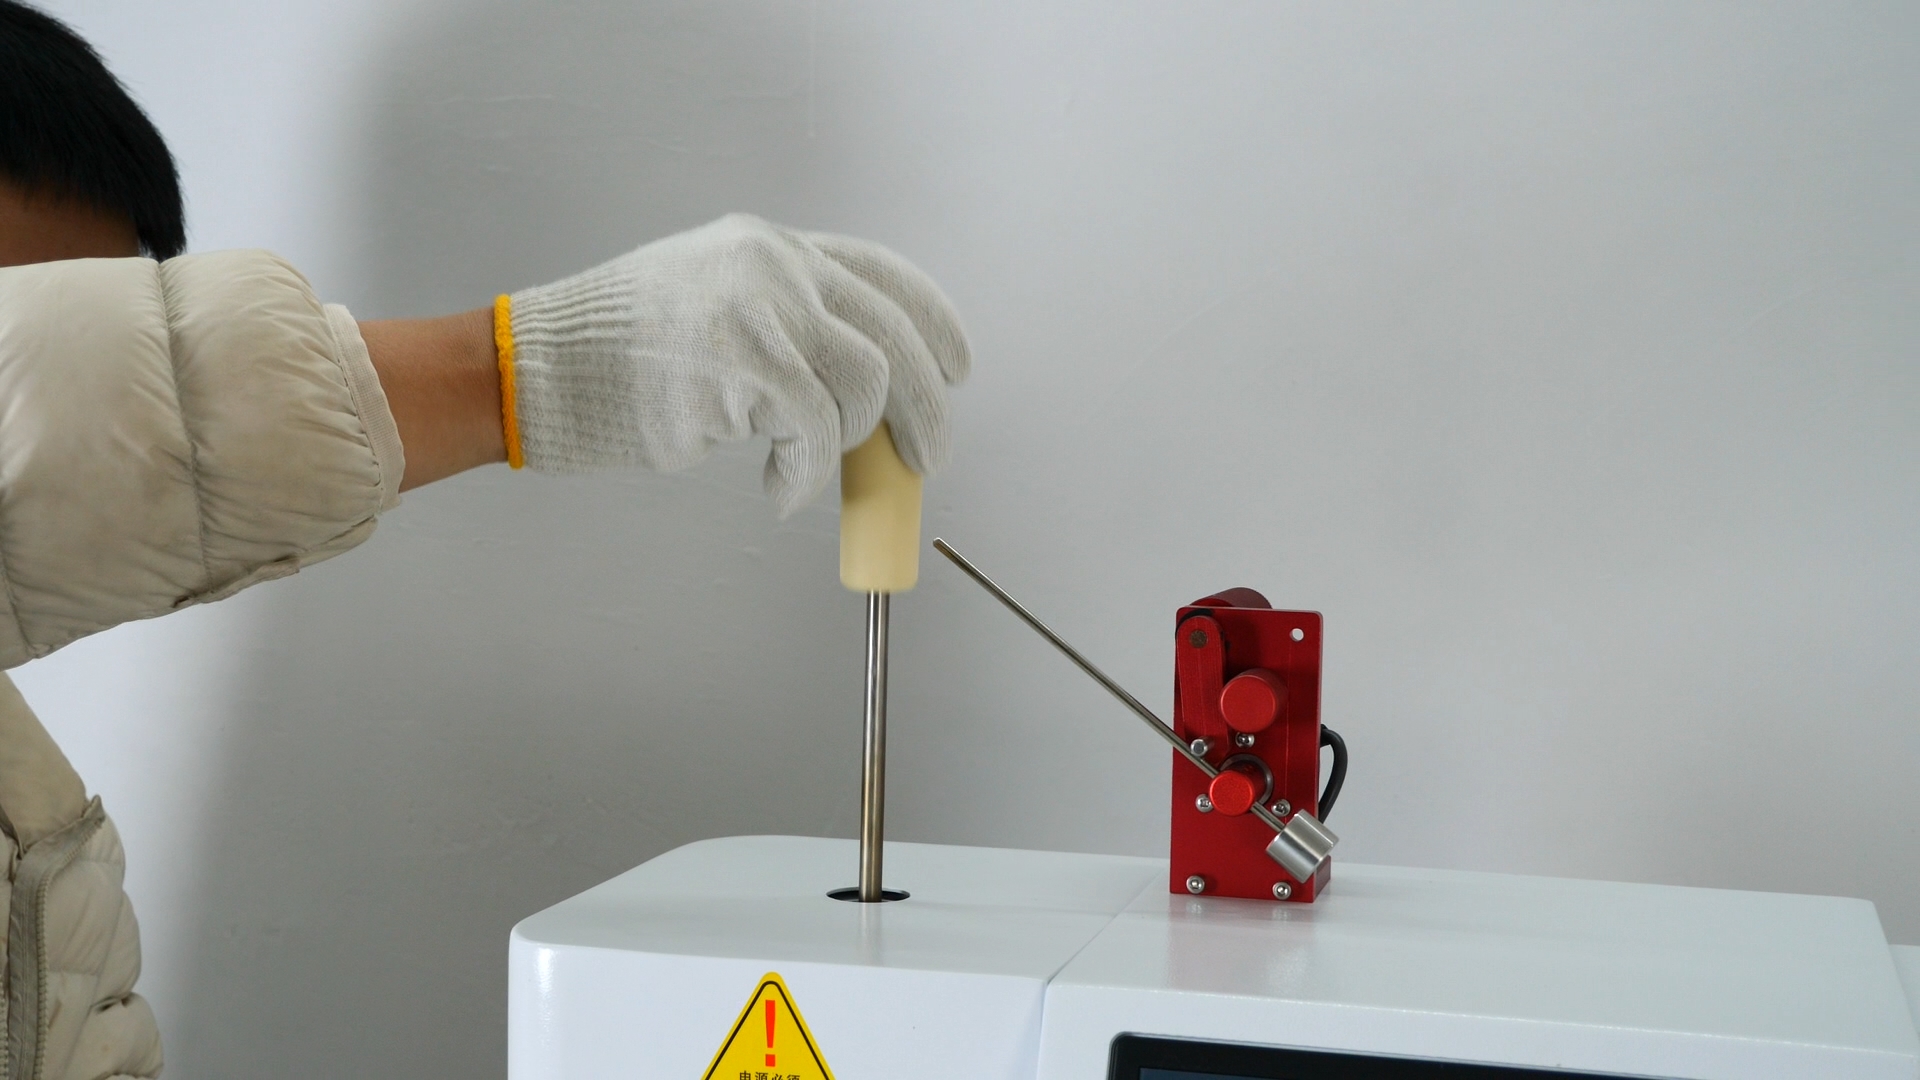
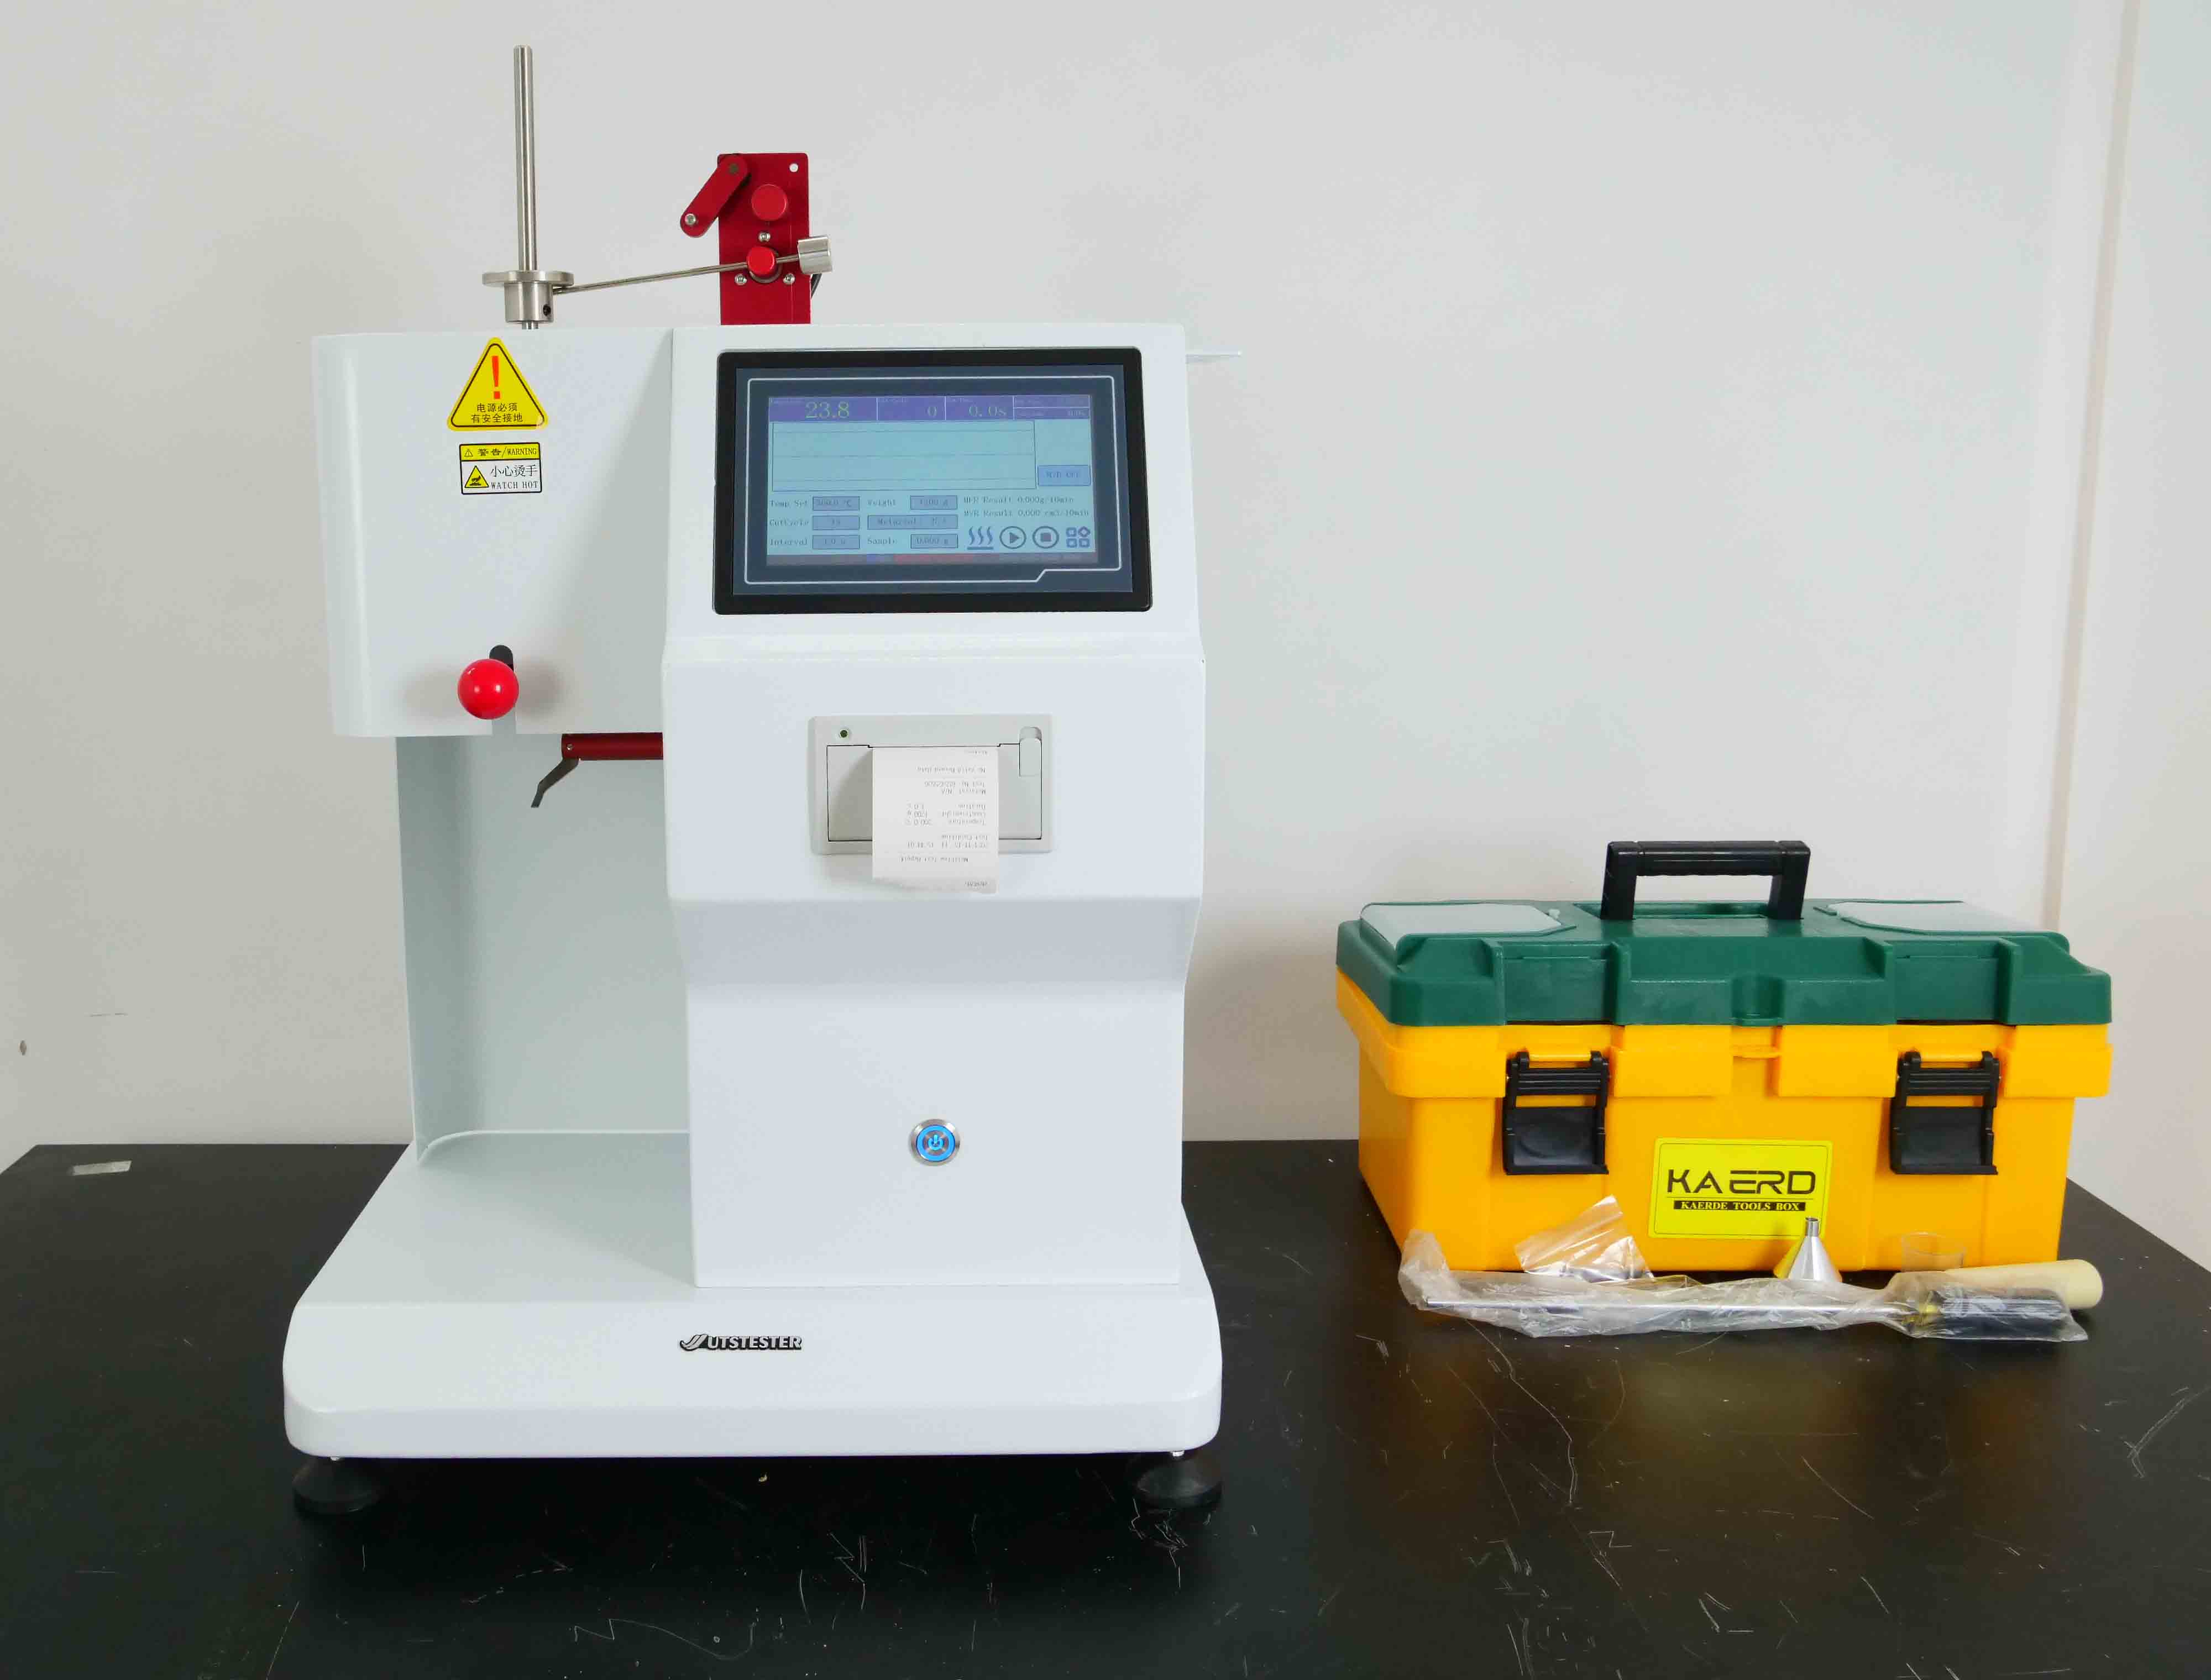
Shoe Lining/Sock Cover Waterproof Testing

Product Name: Shoe Lining Water Permeability Tester/Shoe Lining Waterproof Tester


Sock cover waterproof testing is a critical step in evaluating the water resistance of sock covers (such as splash resistance, water seepage resistance, and water pressure resistance). It is widely used in quality inspection for sock cover products in outdoor, medical, and industrial protective scenarios.


1. Product Description:

The shoe lining water resistance tester rapidly detects whether rubber-soled shoes and inner linings are waterproof. This machine can be integrated into production lines for 100% inspection of finished products, ensuring comprehensive control over waterproof quality. During testing, the machine's pneumatic fixture seals the test specimen and submerges it in water while simultaneously injecting pressurized air. Any water ingress immediately produces bubbles. Upon reaching the preset test duration, the fixture automatically floats the specimen to the surface.


2. Test Methods:

Inflation Method: Seal the shoe opening. Fill the sealed shoe cavity with compressed air at a specified pressure, then submerge the shoe in a water tank. Maintain the water level within 75mm of the shoe opening. After a specified duration, inspect the shoe surface for bubbles.

Immersion Method: Submerge the shoe in water, maintaining the water level within 75mm of the shoe opening. After a specified immersion period, remove the shoe and inspect for water ingress.

Compliant Standards: GB/T 20991 Section 5.7, ISO 20344 Section 5.7, AS/NZS 2210.2 Section 5.7, ISO 8782-1, HG/T3664


3. Specifications for Shoe Lining Water Resistance Tester:

Clamp Face Length: 220mm

Simultaneous Testing Capacity: 2 pieces (4 pieces can also be accommodated)

Fixture lifting stroke: 320mm

Inflation pressure: 0~50kPa or (air compressor provided by customer)

Water tank dimensions: 42×42×32cm

Timer: LED, 0~99999999 seconds

Dimensions: 93×50×150cm

Weight: 130kg

Power supply: 1∮, AC220V, 3A


4. Sample preparation:

(1) Samples shall be drawn from batches of finished shoes (boots).

(2) Sample quantity: At least three pairs per group.

(3) Standardized sample conditions: Samples shall be conditioned for at least 24 hours prior to testing at 23°C and 60% relative humidity.

Machine Structure: Consists of motor, clamping device, control panel, pneumatic system, water tank, and main housing assembly


5. Result Evaluation:

(1) When testing by inflation method: Observe whether bubbles emerge from the shoe upper

(2) When testing by immersion method: Observe whether water penetrates into the shoe

shoe lining water resistance tester


Email: hello@utstesters.com

Direct: + 86 152 6060 5085

Tel: +86-596-7686689

Web: www.utstesters.com
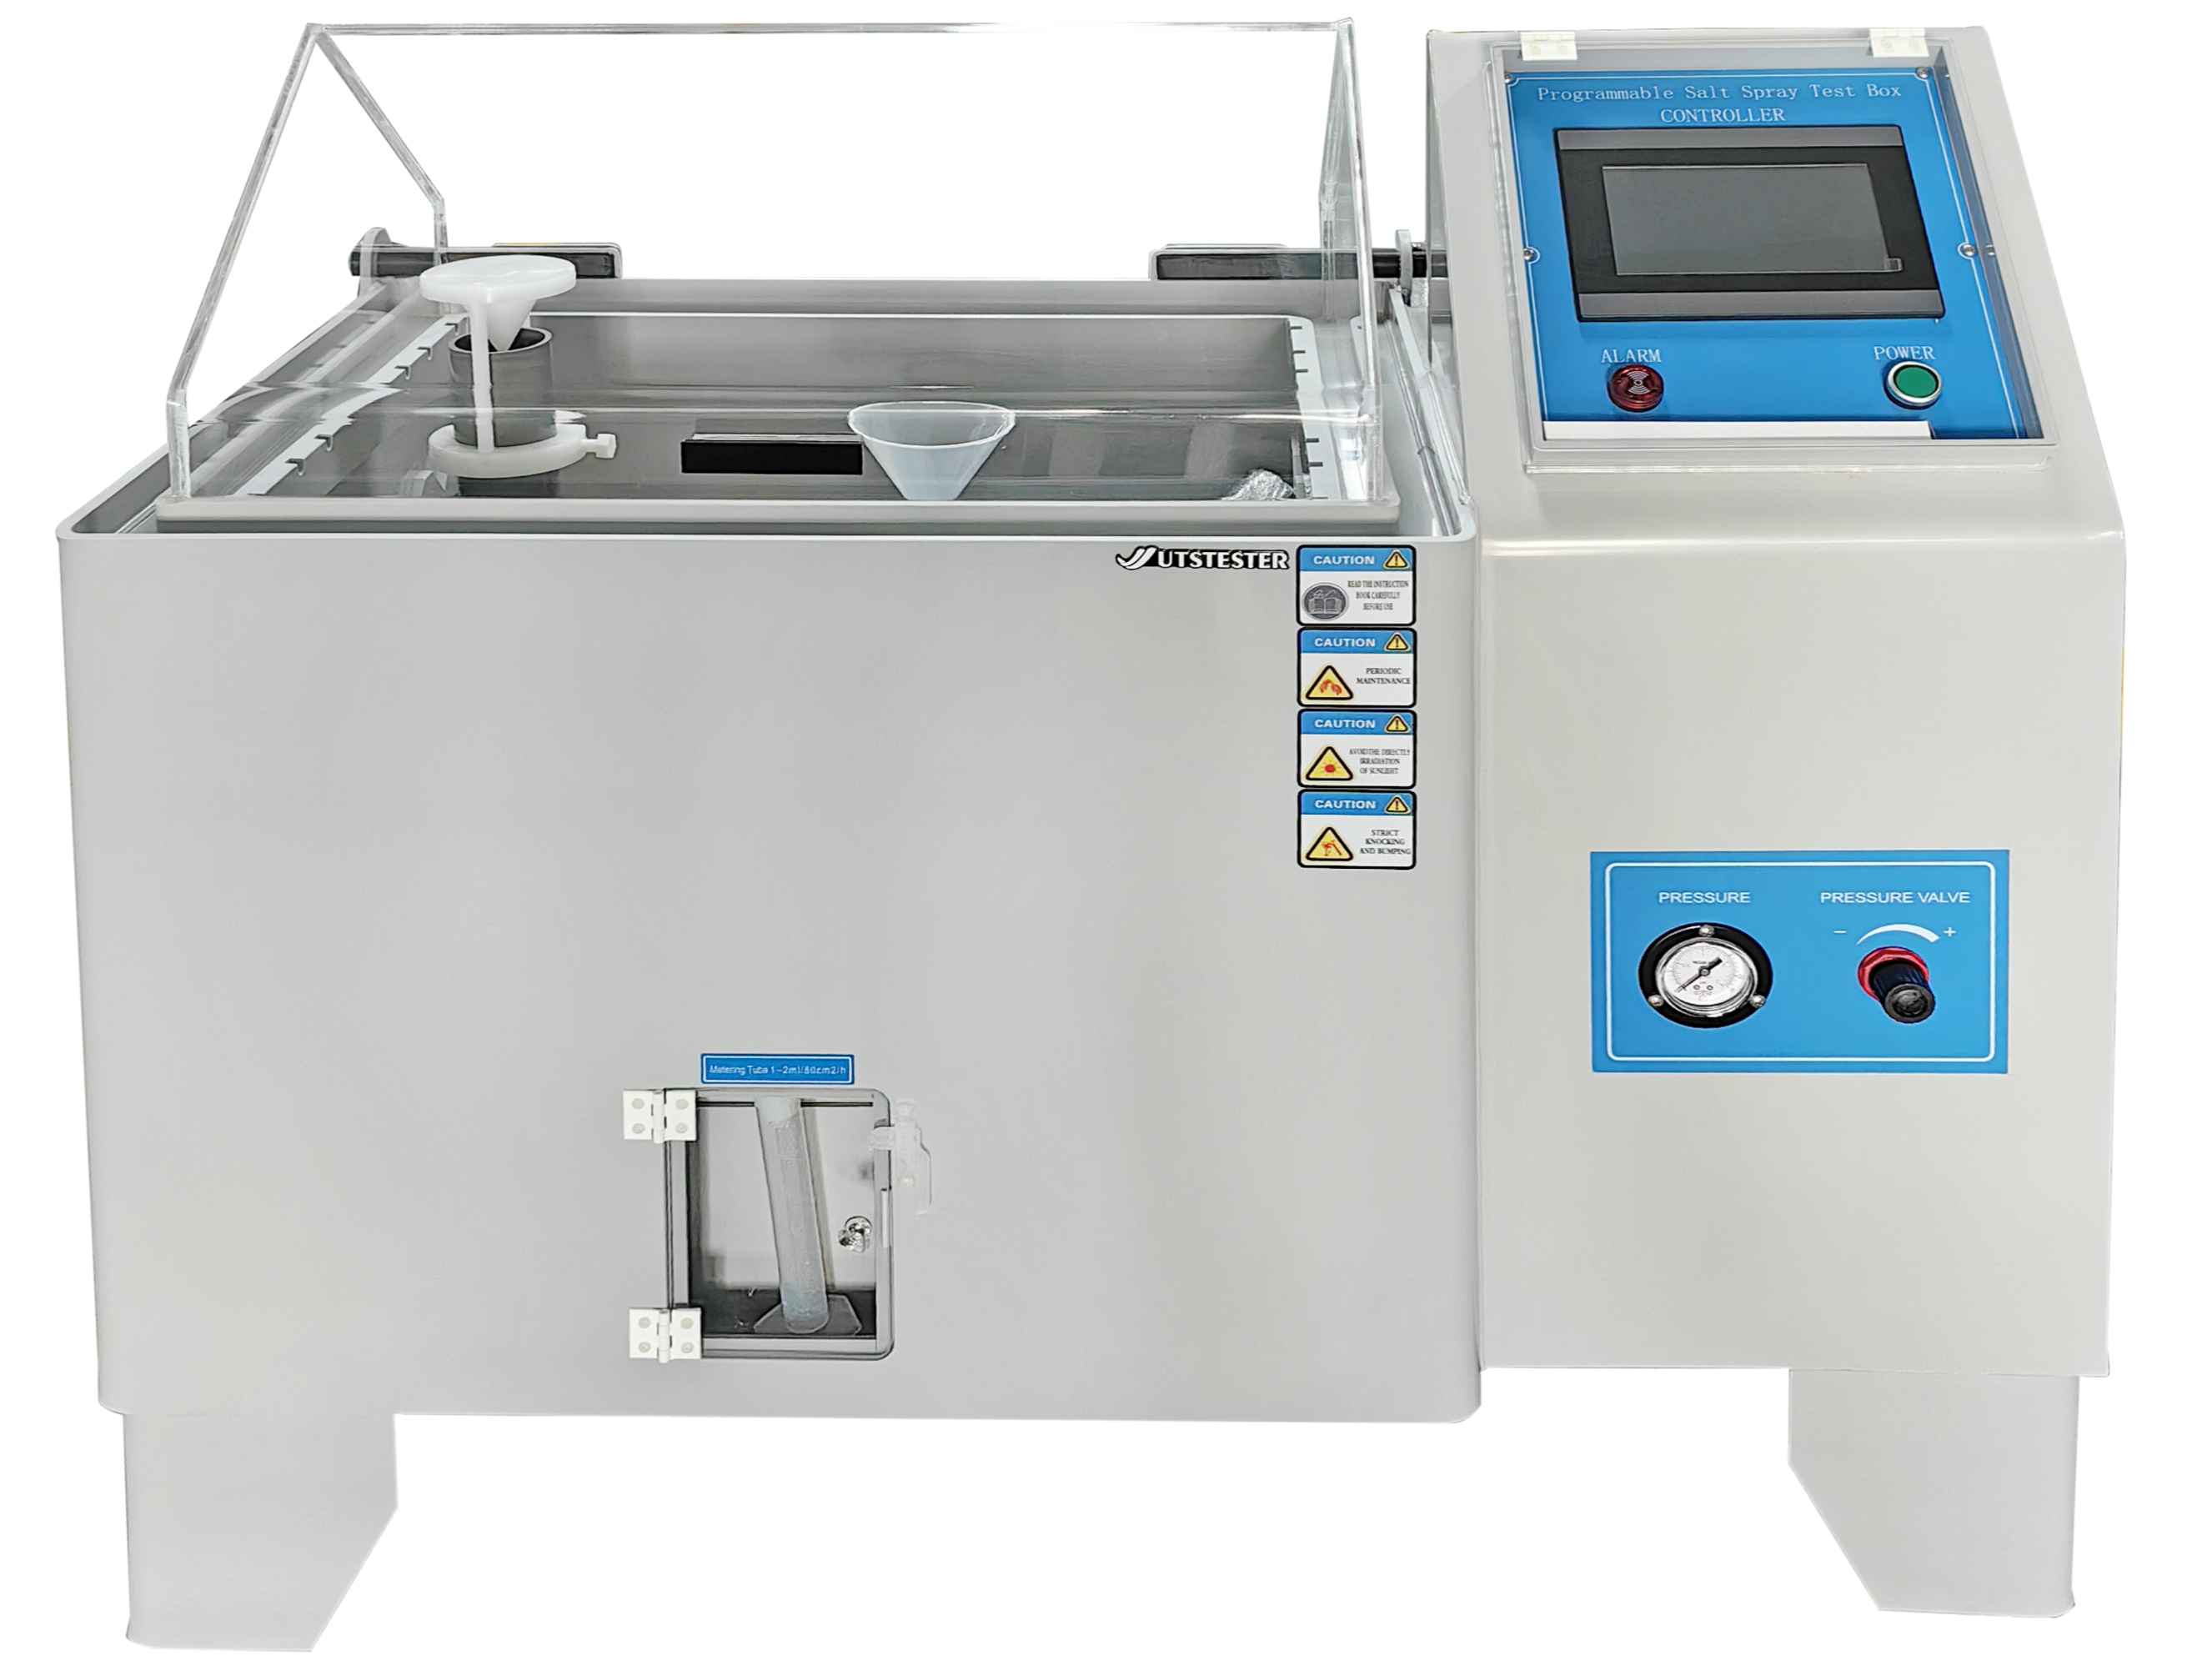

Textile abrasion resistance test standard and grade rating method

Abrasion resistance is an important indicator of textile product quality, which directly affects the durability and use of the product. Specifically refers to the fabric between or with other substances in the process of repeated friction, resistance to wear and tear characteristics.

Wear manifested in the form of fabric changes are mainly broken, loss of quality, appearance of discolouration, pilling and other changes. There are various methods for testing the abrasion resistance of textile products, such as the flat grinding method, the curved grinding method, the folded edge grinding method and the composite grinding method, etc. The Martindale method belongs to the flat grinding method. Martindale method is a kind of flat abrasion method, which is widely used in the abrasion resistance testing of clothing, home textiles, decorative fabrics and furniture fabrics.


Martindale abrasion testing machine can test the abrasion resistance and pilling performance of various plants. Under a certain pressure, the specimen and the specified abrasive material are continuously rubbed in different directions, and the degree of abrasion and pilling is evaluated in comparison with the standard parameters. Touch screen control with full-featured programmer with pre-programmed batch and total counts, individually set counts for each test head; 4 speeds can be selected including the standard speed.


Conforms to the standard:

GB/T 21196.1-2007 Textiles: Determination of abrasion resistance of textiles by Martindale method Part 1

GB/T 21196.2-2007 Textiles: Determination of abrasion resistance of textiles by Martindale method Part 2

GB/T 21196.3-2007 Textiles: Determination of abrasion resistance of textiles by Martindale method Part 3

GB/T 21196.4-2007 Textiles: Determination of abrasion resistance of textiles by Martindale method Part 4

GB/T 4802.2-1997 Textiles Textile pilling test by Martindale method

GB 8690-88 Woolen fabrics abrasion resistance test method Martindale method

ISO 12945-2:2002 Textiles Determination of surface pilling properties of fabrics Part 2 Martindale method

GB/T 13775-92 Abrasion resistance test for cotton, linen and silk woven fabrics Martindale method

ASTM D4966-1988 Abrasion resistance test of fabric Martindale abrasion tester

ASTM D4970-2002 Test Method for Pilling and Snagging Resistance of Fabric Martindale Tester


Rating method:

Mainly refer to the expert subjective rating method to evaluate the hairiness and pilling index, choose Martindale pilling instrument, with reference to GB/T4 802.2-1997 for experiments, the bottom film composite nonwoven raw materials friction 120 (150 finished products), the surface and leakage-proof spacer nonwoven fabric friction 30, test 8 samples, comparison of friction samples and standard samples of the surface of the surface of the hairy surface condition and entanglement points, on the Each sample is judged by its linting level, which is mainly divided into 4 levels:

Level 1: Qualified (tangle point is 0) no linting

Level 2: qualified (tangle point ≤ 5) slight hairiness

Level 3: unqualified (tangle point ≤ 10) more serious pilling

Grade 4: Unqualified (tangle point>10) serious pilling

Pilling condition or tangled points between 3 and 4 are judged to be 3.5 grade.

The final level of the sample = (X1+X2+...+X8)/8, the final level of ≤ 2 for qualified products, if the 8 test samples appear 2 or more pieces of serious pilling is considered unqualified samples.


Email: hello@utstesters.com

Direct: + 86 152 6060 5085

Tel: +86-596-7686689

Web: www.utstesters.com

What is Delta E in a colorimeter? And what do Lab color values represent?

1.What is Delta E?


Delta E is a calculation method used to measure the difference between the displayed color and the input color. A lower Delta E value indicates higher accuracy, while a higher Delta E value indicates a significant mismatch.

It is a standard metric established by the Commission Internationale de l'Éclairage (CIE).

The letter "E" in Delta E stands for "Empfindung", which means "sensation" in German. Delta is a Greek term that represents the incremental change of a variable. Overall, the term Delta E refers to the difference in sensation.

Delta E has a measurement range of 0 to 100, where 0 means minimal color difference and 100 means complete color distortion. The standard range of perceptual differentiation is as follows:

≤ 1.0: Imperceptible to the human eye

1–2: Perceptible upon close observation

2–10: Obvious at a glance

11–49: Color similarity exceeds contrast

100: Completely opposite colors


2. What Do Lab* Color Values Represent?


Colors measured in the CIE Lab color space are defined by three coordinates – L*, a*, and b* – with each coordinate corresponding to the following attributes:

L* – Lightness

a* – Degree of redness or greenness

b* – Degree of yellowness or blueness


Thus, Delta E (total color difference) is calculated based on delta L*, delta a*, and delta b* color values. All these values together provide a complete numerical description of a color within a rectangular coordinate system. Their specific meanings are as follows:


delta L*: Lightness difference between the sample and the standard color

delta a*: Redness or greenness difference between the sample and the standard color

delta b*: Yellowness or blueness difference between the sample and the standard color


3. How to Calculate Delta E?


In the context described in Section 2 above, the higher the value, the greater the difference in that specific dimension. Since Delta E is derived from three core components, its calculation is easier than you might think.

You simply need to calculate the square of the difference between the corresponding L*, a* and b* values, sum these squared differences together, and finally take the square root of this total sum.


This formula clearly quantifies the difference between two colors.

Then how can we determine whether the data measured by the instrument deviates from the target color in terms of lightness or darkness, redness or yellowness?

For a more intuitive understanding, you can refer to the diagram below.


Email: hello@utstesters.com

Direct: + 86 152 6060 5085

Tel: +86-596-7686689

Web: www.utstesters.com


What is the difference between single column and double column of universal tensile testing machine?

The tensile testing machine is designed for footwear, rubber, plastic, leather, metal, nylon thread, fabric, paper, aviation, packaging, construction, petrochemical and other tensile, compression, bending, shear, adhesive strength, peeling, tearing and other tests and design, electricians, vehicles and other materials.

According to the structure can be divided into single-column and double-column type, both in the design, performance and application scenarios there are obvious differences.


Differences in structural design

1. Single-column tensile testing machine: a single column (or frame) is used as the main support, the loading system and transducer are usually integrated above the column, and the specimen is mounted between the upper and lower fixtures, with a compact overall structure and small footprint.

Similar to the ‘T’ type or ‘L’ type, the upper part of the loading device, the lower part of the base (fixed lower fixture).

2. Double-column Tensile Testing Machine: Supported by two parallel columns (or frames), the loading system is located at the top, the testing space is formed between the two columns, and the lower fixture is fixed on the base, with a symmetrical and stable structure.

Similar to the ‘door’ type (door structure), two columns perpendicular to the base, the test space is located in the middle, the overall volume is larger.


Load capacity and applicable materials

1.Single-column type: the maximum test force is usually ≤10kN (a few can reach 20kN), suitable for small load test (such as film, fibre, rubber, plastic and other flexible materials), or small parts (such as springs, electronic components) of the tensile and compression test.

2.Double-column type: the maximum test force can cover 10kN-500kN (or even higher), can withstand large loads (such as steel, concrete, automotive parts, etc.), suitable for high-strength materials mechanical properties testing, such as tensile strength, yield strength.

Application: Widely used in aerospace, machinery manufacturing, construction building materials and other industries for quality testing.


Operation and Expandability

Single-column type: small size, light weight, easy to move, suitable for laboratory desktop use; but with limited functional expandability (e.g., difficult to install complex accessories, such as high-temperature furnace, environmental chamber, etc.).

Double-column type: usually equipped with a larger working surface and expansion interface, can be added with an extensometer, high/low temperature environmental devices, dynamic loading system, etc., to support multi-functional testing (such as fatigue test, creep test, etc.).


Summary

The core difference between single-column and double-column tensile testers lies in the load capacity, precision and structural design, the former is suitable for small load and low precision scenarios, while the latter is suitable for large load, high precision and complex testing needs. The selection should be based on the material characteristics, testing standards, budget and functional requirements of a comprehensive judgement to ensure that the equipment performance and application scenarios match.


Email: hello@utstesters.com

Direct: + 86 152 6060 5085

Tel: +86-596-7686689

Web: www.utstesters.com
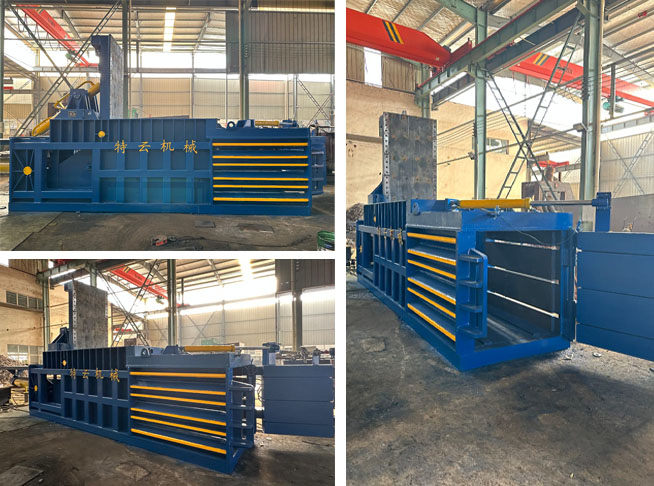

Why Box Compression Testers Are Essential in the Packaging Industry

From rough handling during e-commerce parcel sorting to multi-layer stacking in warehouses, packaging boxes constantly endure external forces. As the core equipment for quantifying packaging protection capabilities, box compression testers help measure the pressure a box can withstand before collapse, ensuring product safety during transportation and storage.


1. What is a Box Compression Tester?


A box compression tester (also known as a carton compression tester) is a specialized device that uses standardized loading methods to evaluate the crush strength, stacking endurance, and deformation characteristics of packaging containers (such as corrugated boxes, honeycomb panels, etc.). It applies controlled force to a box until it deforms or collapses, clearly indicating its load-bearing capacity. It precisely measures three core metrics: maximum crush strength (the highest load before box failure), stacking strength (long-term deformation resistance under constant load), and deformation rate (shape change under specific pressure), providing quantifiable data for packaging quality.


2. Why is a Box Compression Tester Needed?


The packaging industry is rapidly evolving. Online shopping, global trade, and sustainability demands are driving companies to create stronger, lighter, and more eco-friendly boxes. But how do you know if your packaging is up to the task? This is where the box compression tester becomes a game-changer:

Protect Products: Boxes are stacked in warehouses, loaded onto trucks, and jostled during transit. Weak boxes may collapse, damaging contents inside. Testing ensures your packaging withstands pressure.

Save money: Damaged products mean refunds, replacements, and lost trust. By identifying weaknesses early, you avoid these headaches and cut costs.

Meet standards: Many industries have strict packaging strength regulations. Box crush testers help prove your boxes meet these requirements, avoiding legal or compliance issues.

Enhance Reputation: Customers expect their orders to arrive intact. Sturdy packaging builds trust and fosters repeat business.

Sustainability: Eco-friendly packaging is a major trend. Lighter materials reduce waste, yet must remain robust. Testing helps strike the perfect balance.

As supply chains grow increasingly complex and customer expectations rise, investing in this tool is a wise move for any business serious about packaging.


3. Working Principle of the Box Compression Tester


The device operates based on mechanical loading and sensor detection principles. Its core structure comprises a fixed lower platen, a movable upper platen, a force sensor, and a control system. Testing follows a three-step core logic:

Load Simulation: Position the sample centrally on the plates. Apply an initial load to ensure tight contact. Subsequently, drive the upper plate via motor-operated screw (or hydraulic transmission) to apply uniform pressure at a standardized rate, precisely replicating warehouse stacking and transportation compression scenarios.

Data Acquisition: The LOAD CELL force sensor captures pressure changes in real time, simultaneously recording the pressure-deformation curve.

Result Output: Automatic shutdown occurs upon reaching preset load or container failure. The system generates data including peak force and deformation rate. Some intelligent devices can directly print test reports in both Chinese and English.


4. Core Applications of the Container Compression Tester


Though termed a carton compression tester, this tool extends beyond corrugated boxes. Its applications span diverse industries and materials.

Corrugated Boxes: Most commonly used to test how much weight shipping boxes can withstand before collapsing.

Cartons and Drums: From small single boxes to large drums, the tester checks their stacking strength.

E-commerce Packaging: Online retailers use it to ensure their boxes survive long-distance shipping.

Food Industry: Think of crates for fruit or beverage cartons—testing ensures perishable goods arrive safely.

Warehousing: It helps determine how high boxes can be stacked without collapsing, maximizing storage space.


5. Box Crush Tester FAQ


1. What is a box crush tester used for?

The Box Crush Tester (BCT) measures the crush strength of corrugated boxes, cartons, and packaging materials. It helps manufacturers ensure their packaging can withstand stacking and transport pressures, preventing product damage during shipping and storage.


2. What is the formula for box compression testing?

Box Crush Test (BCT) is calculated using the following formula:

BCT = Load (F) × Area (A) × BCT

Where:

BCT = Box Crush Test (in kN or N)

F = Applied Load (in Newtons)

A = Box Surface Area (in square meters)


3. What are the units for BCT?

Box Compression Test (BCT) is typically measured in Newtons (N), kilonewtons (kN), or kilogram-force (kgf), depending on the standard and region.

box compression testers


Email: hello@utstesters.com

Direct: + 86 152 6060 5085

Tel: +86-596-7686689

Web: www.utstesters.com

Why is breathability testing crucial for athletic apparel performance?

Breathability directly impacts wearer comfort, particularly in athletic wear and outdoor gear. Breathable fabrics effectively wick away sweat, keeping skin dry to enhance comfort and athletic performance. In athletic apparel design, breathability is a key metric—designers must ensure selected materials provide adequate airflow during intense activity.


I. Definition of Breathability

Breathability refers to the ability of gases to pass through polymers, including films, coatings, and fabrics. “Vapor permeability” specifically denotes the capacity of water vapor to traverse fabrics, also termed “moisture permeability” within the industry. Ensuring comfort requires meeting both air permeability and vapor permeability requirements.


Fabric breathability measures the ability of air to pass through the material. It is tested by creating a pressure differential across the fabric. Specifically, it is the pressure differential across the fabric. It represents the volume of air flowing through a unit area of the fabric per unit time. The common unit is mm/s. Air requires a pressure differential to flow. The fabric must maintain this pressure differential to generate airflow.


II. Testing Principle

When a pressure differential exists across the fabric, air flows through it. Flow rate is the volume of air passing through a unit area of the fabric per unit time. The common unit is mm/s. Because a pressure differential is essential for airflow.


Only a pressure differential enables air movement. Therefore, the fabric on both sides must maintain a certain pressure differential to allow air passage. Breathability impacts fabric comfort. It affects the fabric's thermal insulation and warmth retention. Fabric breathability is crucial for the body. It transfers heat, moisture, and gases like carbon dioxide to the outside.


III. Why Sportswear Requires Breathability

During exercise, the human metabolic rate increases dramatically, generating significant heat and sweat. Data indicates that during high-intensity exercise, the human body can sweat 0.5-2 liters per hour. At this point, the core mission of athletic apparel is to rapidly dissipate heat and expel sweat, maintaining the balance of the “microclimate” between the skin and the garment—the temperature, humidity, and airflow velocity of this microclimate directly determine wearing comfort.


Well-ventilated athletic apparel creates efficient airflow channels, allowing cool external air to enter while expelling warm internal air for effective heat exchange. Simultaneously, moisture-wicking properties rapidly transport sweat from the skin's surface to the outer fabric layer for evaporation, preventing the sticky discomfort caused by sweat buildup. Conversely, poorly breathable garments act like an “airtight barrier,” trapping heat and sweat between skin and fabric. This raises perceived body temperature by 2-3°C, causing intense discomfort and increasing the risk of skin friction injuries.

Breathability testing scientifically quantifies a fabric's air transmission capacity, ensuring clothing maintains its “thermoregulatory” function across varying exercise intensities.


IV. Performance Impact of Apparel Breathability

For professional athletes or enthusiasts pursuing athletic efficiency, breathability not only affects comfort but directly impacts performance. Sports medicine research indicates that insufficient breathability in clothing causes sustained increases in core body temperature, leading to accelerated heart rate and heightened physical exertion. This can reduce exercise endurance by over 18%.


Different athletic scenarios demand varying levels of breathability, and breathability testing enables companies to achieve “precise matching.” For instance: - Polyester fabrics commonly used in running apparel must ensure an air permeability rate ≥120mm/s to manage sustained heat generation; Nylon fabrics for mountaineering apparel must prioritize moisture evaporation rates ≥550g/m²/h to meet sweat management demands in variable outdoor conditions; while elastic garments like yoga wear require testing for breathability changes ≤10% after 20% stretch to ensure stable ventilation during movement.


Additionally, breathability and fabric dynamic adaptability must be validated through testing. Body movements and fabric stretching during exercise alter pore structures. Dynamic breathability testing simulates real-world motion to ensure garments maintain consistent breathability under conditions like stretching and friction, preventing performance degradation due to breathability failure during activity.


V. Apparel Fabric Breathability Testing Instruments

The precision of breathability testing directly relies on specialized testing instruments. High-quality textile testing equipment can simulate various environmental conditions (temperature, humidity, pressure differential) to accurately measure multiple indicators such as air permeability, moisture resistance, and thermal resistance, providing enterprises with comprehensive and reliable performance data.


Digital breathability testers deliver reliable results quickly. They are suitable for breathability testing of various textiles. This includes technical textiles, nonwovens, and other breathable products. It complies with standards such as GB/T5453, GB/T13764, ISO9237, ISO7231, ISO5636, ASTM D737, DIN 53887, JIS L1096, BS5636, and others.


Air flows vertically through the fabric. This creates a pressure difference between the front and back surfaces of the fabric. We measure the airflow rate through the fabric at a set pressure differential. This yields the air permeability value.


Conclusion: Prioritizing Air Permeability Testing to Create Truly “High-Performance Sportswear”

From wear comfort to athletic performance, from health safety to market competitiveness, air permeability is an indispensable core performance characteristic of sportswear. Air permeability testing serves as the “critical link” in ensuring this performance. It not only provides enterprises with precise performance data to support R&D upgrades and quality control but also enables consumers to purchase functional sportswear that genuinely meets their needs.


As a dedicated player in the textile testing instrument field, we remain committed to delivering breathability testing solutions compliant with international and domestic standards. This empowers enterprises to accurately control product breathability performance and enhance their core competitiveness.

Fabric Breathability Testing Instruments


Email: hello@utstesters.com

Direct: + 86 152 6060 5085

Tel: +86-596-7686689

Web: www.utstesters.com


Why is flexural resistance testing crucial for shoes?

Footwear is an indispensable part of our daily lives, especially athletic shoes, which provide comfort and protection during daily activities. In shoe production, one of the key factors determining product quality is the shoe's ability to withstand continuous use and flexing. This is where flexural resistance testing instruments come into play. Below, we introduce the flexural resistance testing instruments used for athletic shoes.


1. Shoe Flexing Tester

The shoe flexing tester is primarily used to test the flexing performance of finished shoes such as athletic shoes, casual shoes, and work shoes. By simulating the flexing movements of shoes during wear, it evaluates the shoe's flexing performance or assesses the extent of cracking. This equipment is widely used in shoe manufacturing companies, quality inspection institutions, and research organizations, playing a significant role in enhancing product quality and meeting market demands.


2. Working Principle

The working principle of the shoe bending tester is based on material mechanics and fatigue testing theory. A motor drives a mechanical arm or crank-connecting rod mechanism to cause the shoe sample installed on the test bench to undergo periodic bending at a predetermined angle and frequency. During the test, the device records and analyzes data such as the bending force, deformation amount, and failure mode of the shoe, providing a scientific basis for evaluating shoe performance.


3. Key Features

(1) Body surface treatment: Utilizes DuPont powder from the United States, electrostatic spraying process, and high-temperature curing at 200°C to ensure long-term color retention.

(2) Mechanical components made of corrosion-resistant aluminum alloy and stainless steel materials;

(3) LED-SLD806 integrated display control box with menu-based operation mode;

(4) Precision variable-frequency drive motor for smooth operation and low noise;

(5) One-button fully automatic testing for easy operation;

(6) High-precision bearing selection for stable rotation and extended service life;

(7) Dual-station vertical structure design for stable bending and high efficiency;

(8) Adjustable front and rear clamping fixtures secured with threaded bolts for secure fixation;

(9) Adjustable speed and angle, movable rear clamping fixture, and adjustable dimensions;

(10) High-power industrial fan with strong suction force, and adjustable fixed-angle air nozzle direction.


4. The Importance of Whole Shoe Flexing Testers

(1) Ensuring Durability and Comfort

Poorly designed shoes can cause significant discomfort, leading to serious health issues. One of the most significant benefits of whole shoe flexing testers is that they help ensure the durability and comfort of shoes. By subjecting shoes to repeated flexing, testers can determine whether they can withstand normal wear and tear. This ensures that customers receive durable and comfortable shoes, providing long-term satisfaction.

(2) Consistency in Quality

The whole shoe bending tester also helps ensure consistency in quality. By assessing its bending performance or examining its cracking extent, manufacturers can identify weaknesses in the design and make necessary adjustments to improve the quality of future products.


(3) Compliance with industry standards

The whole shoe bending tester is an important tool for ensuring compliance with industry standards. Most shoe manufacturers must adhere to industry standards, which specify the minimum durability and quality requirements for shoes. By using a whole shoe bending tester, manufacturers can ensure that their products meet these standards, thereby reducing the risk of product recalls, lawsuits, and negative publicity.

(4) Competitive advantage

A whole shoe bending tester can also provide manufacturers with a competitive advantage. Through quality testing, manufacturers can differentiate their products from competitors and establish a reputation for producing high-quality, durable shoes.

shoe bending tester


Email: hello@utstesters.com

Direct: + 86 152 6060 5085

Tel: +86-596-7686689

Web: www.utstesters.com


Why use an extensometer for tensile testing?

When performing a tensile test on a material, the most critical step is measuring the material's elongation. Relying solely on the crosshead displacement data of the testing machine faces a fundamental limitation: crosshead movement includes machine backlash, slippage of the specimen's gripping end, and even localized plastic deformation of the specimen in the fixture. These errors significantly interfere with the accurate measurement of the true deformation within the specimen's gauge length. Therefore, an extensometer acts as the "eagle eye" of material tensile testing, precisely focusing on the specimen's gauge length and directly measuring the true deformation within the material's gauge length.


An extensometer is essentially a high-precision strain measurement instrument. It can be either contact-type (such as a knife-edge extensometer, which uses a knife-edge to directly contact the specimen) or non-contact (such as a video extensometer or laser extensometer, which uses optical tracking to track marked points on the specimen surface). Its purpose is to eliminate all interference and capture the material's true strain response within the gauge length. It can accurately measure key mechanical properties of a material, including elastic modulus (initial slope of the stress-strain curve), specified non-proportional extension strength (such as Rp0.2), yield strength, and uniform elongation. These critical parameters are highly dependent on the specimen's minute elongation during the elastic and small plastic deformation stages.


The use of an extensometer is a crucial step in testing:

1.For contacting extensometers, align the blade and gently press it against a marking point on the specimen's gauge section or a dedicated boss, ensuring perpendicular contact between the blade and the specimen. A slight preload should be applied to the blade to eliminate gaps, but not excessive enough to cause localized indentations or interfere with the specimen's free deformation. For non-contacting extensometers, a clear, high-contrast speckle pattern or marking point should be created on the specimen's gauge section. The lens focus, angle, and lighting should be precisely adjusted to ensure stable tracking of the marking point throughout the test.


2.Before formal testing, the extensometer must be calibrated using a standard gauge block to establish an accurate conversion relationship between its output signal and actual deformation. After installing the extensometer and before applying any load, perform a "zero reset" operation in the software to eliminate installation prestrain and system zero drift. Some systems also require a "gauge length setting" procedure to enter the actual gauge length of the extensometer.


3.Start the tensile test. The extensometer transmits the deformation signal to the controller or data acquisition system in real time. The extensometer status must be closely monitored to prevent accidental contact or slippage. It is particularly important to promptly and carefully remove some contacting extensometers just before the material enters or reaches the yield stage (for example, before significant necking occurs) to prevent the violent rebound upon specimen fracture, which could damage the expensive sensor. Non-contact extensometers, on the other hand, typically monitor the entire process until specimen fracture, fully capturing the necking and fracture process.

The mechanical properties of materials (especially elastic modulus, yield strain, and elongation) require extremely high deformation measurement accuracy. Extensometers accurately, in real time, and continuously capture minute deformations within the gauge length, eliminating equipment errors, human errors, and missed stage deformations, providing a key guarantee for the reliability of test results. From towering bridge steel to sophisticated microelectronic components, the precise strain data provided by extensometers has always been an indispensable cornerstone of modern materials science research and engineering safety design. They allow us to clearly understand the true response of materials under the action of force, providing a solid foundation for building a reliable world.


Email: hello@utstesters.com

Direct: + 86 152 6060 5085

Tel: +86-596-7686689

Web: www.utstesters.com

A Complete Guide to Different Paintbrush Filament Types From Natural Bristles to High-Tech Synthetics

A Complete Guide to Different Paintbrush Filament Types: From Natural Bristles to High-Tech Synthetics


Choosing the right brush filament is crucial for a perfect paint job. This guide breaks down the features of the four main types to help you pick the best one for your project.


Natural Choice: Bristle Brush Filaments

Material Source: Mainly from hog bristles. Natural and eco-friendly.

Spring & Stiffness: Good springback and medium stiffness. Provides excellent control during application, helping paint go on smoothly without drips or build-up.

Paint Pickup & Release: Holds a decent amount of paint and releases it steadily. Means you don't have to keep dipping into the can, which speeds up your work.

Durability: Holds up well to repeated use and cleaning. However, it has weaker resistance to strong acids or alkalis and can be damaged in harsh chemical environments.

Best For: Oil-based paints. Ideal for furniture finishing, marine paints, and other jobs where a smooth, fine finish is key.


Precision Choice: Tapered (Microfiber) Filaments

Shape: Fibers are precision-tapered to a fine point. This lets the brush get into tiny cracks and detailed textures.

Finish: Creates an exceptionally smooth, even coat with a high-quality level surface. Perfect for demanding jobs like automotive touch-ups or painting electronics.

Wear Resistance: Highly wear-resistant. Holds its shape and performance over time, giving the brush a long lifespan.


Efficient Choice: Hollow (Hollow Core) Filaments

Structure: Hollow core construction makes the filaments very light. This makes the brush easy to handle and reduces arm fatigue.

Paint Pickup & Release: Superb paint capacity. Soaks up paint quickly and releases it evenly, minimizing waste. The hollow core helps paint flow smoothly for faster coverage.

Spring & Softness: Excellent springback and a soft feel. Conforms well to curved or irregular surfaces for a uniform coat.


All-Rounder Choice: Blend Filaments

Performance: Combines the best of both worlds – the spring and stiffness of natural bristle with the durability and paint capacity of synthetics. For example, mixing bristle with tapered synthetics gives a great finish and long brush life.

Versatility: By adjusting the blend ratio, these brushes can be tailored for a wide range of paints (water-based and oil-based) and various projects. A highly versatile, go-anywhere type of filament.


Brush Filament Comparison Chart

Feature Bristle (Natural) Tapered Synthetic Hollow Synthetic Blend
Material Source Natural Hog Bristle Synthetic Fibers Synthetic Fibers Natural + Synthetic Mix
Spring & Stiffness Good Spring, Medium Stiff Medium Spring & Stiff Good Spring, Soft Balanced Performance
Paint Pickup Moderate Good Excellent (High Capacity) Good
Durability Good (Avoid Harsh Chemicals) Excellent Good to Excellent Good to Excellent
Best For Oil-Based Paints, Furniture, Marine High-Finish Work (Auto, Electronics) Large Areas, Efficiency Versatile - Various Paints & Surfaces
Cost Level Medium Higher Medium Medium to High
Lifespan Medium Long Medium to Long Medium to Long
Maintenance Clean Well, Avoid Chemicals Easy to Clean Easy to Clean Varies by Blend


Quick Selection Guide:

· For a natural product: Choose Bristle.

· For detailed, precision work: Choose Tapered Synthetic.

· For speed and covering large areas: Choose Hollow Synthetic.

· For one-brush-fits-most versatility: Choose a Blend.


Regardless of which you choose, proper cleaning and care will extend the life of your brush and ensure great results every time. Hope this guide helps you choose the right tool for the job!


This article is for reference only. Specific choices should be based on actual project needs and conditions. 

Brush Handle Assembly Methods Compared Which One’s Right for Your Bristle Brush?

When it comes to assembling bristle brushes, how the brush head and handle are joined can make a big difference in durability, appearance, and production efficiency. Today, we’re breaking down two common methods used in the brush-making industry:
 

“Socket & Nail”  – The Secure & Clean Method

“Glue Pouring” – The Fast & Flexible Method

Let’s dive into the details so you can choose the best process for your needs. 


1. Socket & Nail  – Strong, Neat & Efficient

How It Works:

● The bristle tuft  is first inserted into a metal ferrule .

● A small amount of glue is applied to hold the bristles in place while drying.

● Once the glue sets, the ferrule is fitted tightly onto a wooden/metal handle .

● Finally, a nail or rivet  is driven through the ferrule and handle to create a rock-solid bond.


Why It’s Great:

Less glue = lower cost & no mess – Since only a small amount is used, there’s no glue overflow, keeping the brush looking clean.

Super strong & durable – The tight ferrule + nail reinforcement ensures the brush head won’t wobble or detach easily.

Premium finish – No unsightly glue stains, making it ideal for high-end brushes.

nailed paint brush-premium


2. Glue Pouring  – Quick & Forgiving

How It Works:

● The bristle tuft is placed in a metal ferrule, then filled with a generous amount of glue.

● The handle is immediately inserted into the wet glue.

● The assembly is left to cure naturally without needing tight tolerances.


Why It’s Used:

Faster production – No waiting for glue to dry before moving to the next step.More flexible with handle sizes – Since the fit isn’t tight, minor variations in handle dimensions are tolerated.Good for mass production – Works well when speed is prioritized over premium finish.

Downside: The glue seam may be visible, and the bond might not be as long-lasting as the nail method. 

glued paint brush


Which Method Should You Choose?

Factor

Socket & Nail 

Glue Pouring 

Durability

✅ Extremely strong (nail + tight fit)

⚠ Good, but less secure

Appearance

✅ Clean, no glue marks

⚠ May show glue residue

Production Speed

⚠ Requires drying time

✅ Faster (no wait)

Handle Tolerance

❌ Needs precise fit

✅ Flexible with sizes

Cost

✅ Lower glue usage

⚠ More glue needed

🔧 Best for premium brushes? → Socket & Nail

🔨 Best for fast, high-volume production? → Glue Pouring


Final Thoughts

Both methods have their place in brush manufacturing. If you want a long-lasting, professional-grade brush, the socket & nail method is the way to go. But if you need speed and flexibility, glue pouring can be a great alternative.

🛠 Need help choosing the right brush assembly for your product? Drop us a message—we’re happy to help you optimize your brush-making process!